

Are there teachers who use PowerPoint to promote their classes, or students and students who give presentations in class? PowerPoint has a function to display 3D models, but I feel that it is not well known among the public. If you learn how to handle 3D models in PowerPoint on this page, you will definitely broaden your range of expression!
How to use 3D models within PowerPoint and the “Correction Value (Height) for PowerPoint” set for the 3D models on this site.
Insert 3D model
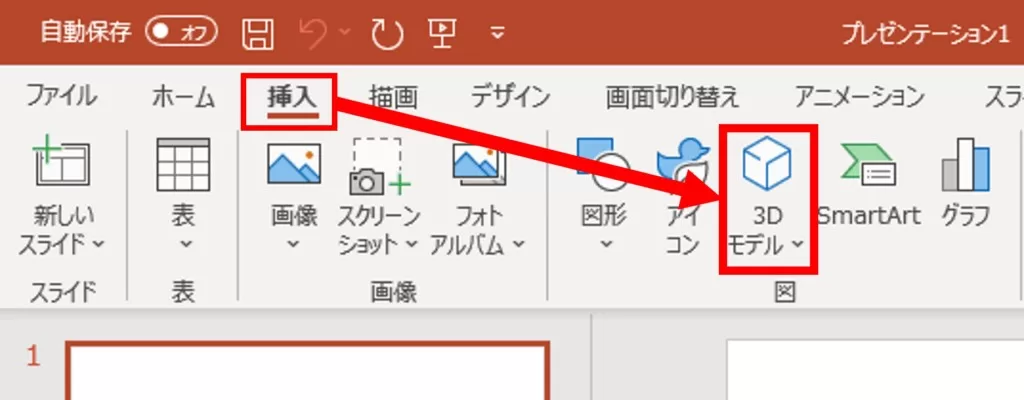
To insert a 3D model into a slide, first click on “3D Model” in the “Insert” tab.
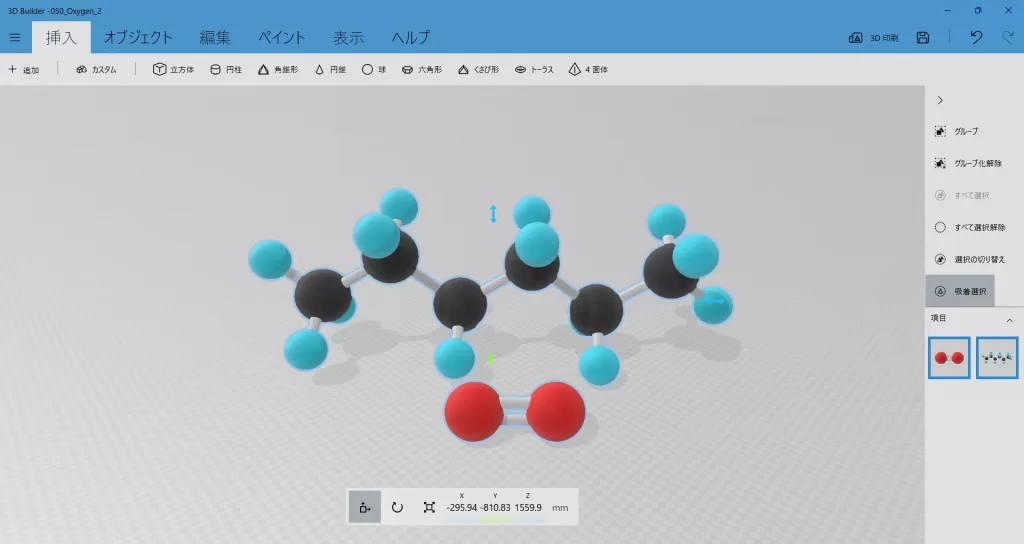
Click to select the source of the 3D model insertion.
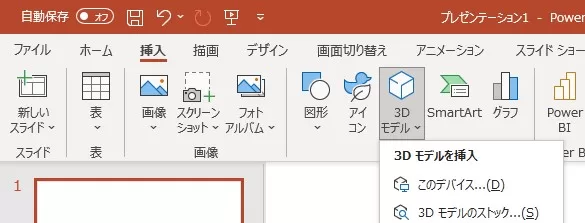
Select “this device”
To insert a 3D model obtained by downloading from a site or other means, select “This device” and then select the file you wish to insert.

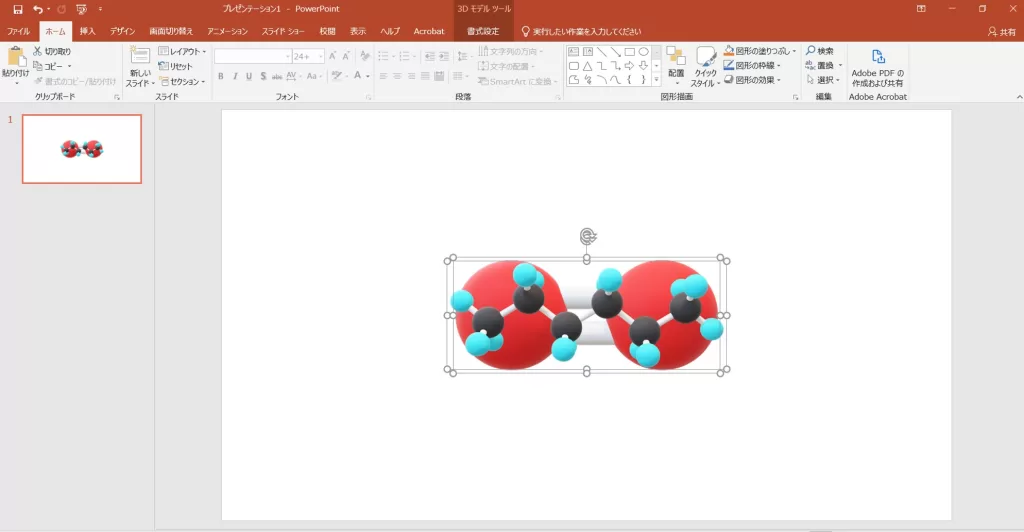
Success is achieved when the 3D model appears in the center of the slide.
Can also be inserted by drag & drop
3D models can also be inserted by dragging and dropping them directly onto slides from the “Explorer,” which allows you to view files stored on your computer.
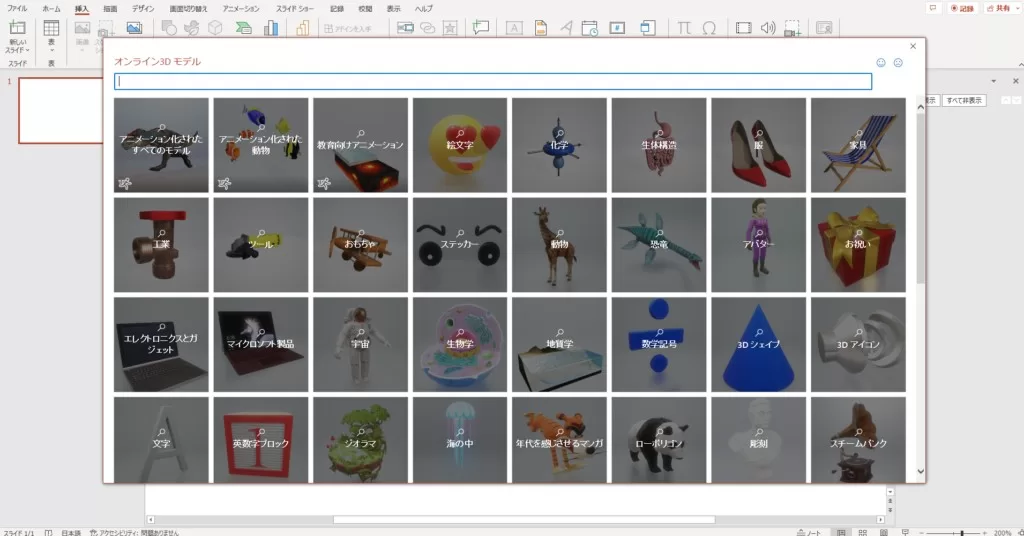
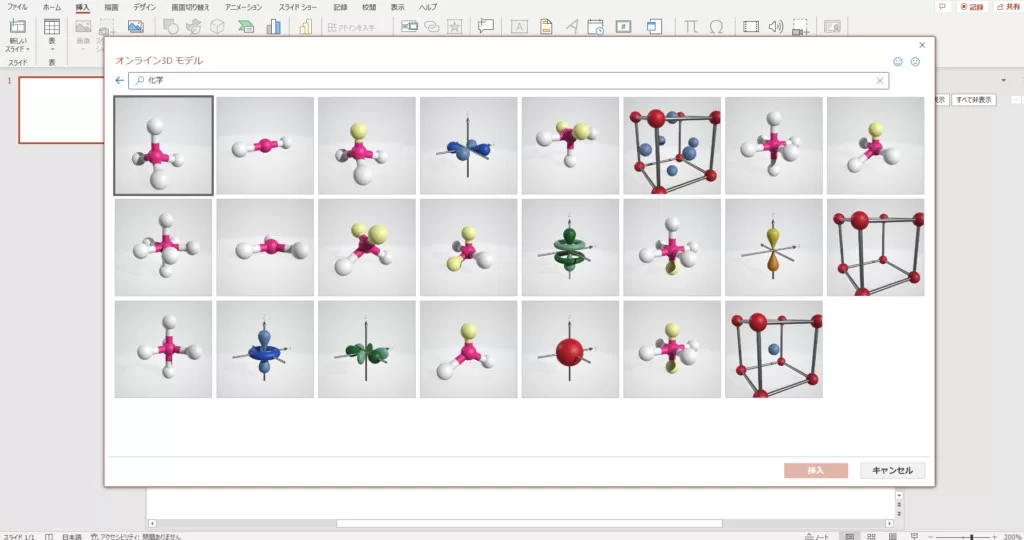
Select “3D Model Stock.”
3D models are pre-prepared in the PowerPoint and can be inserted as you like.
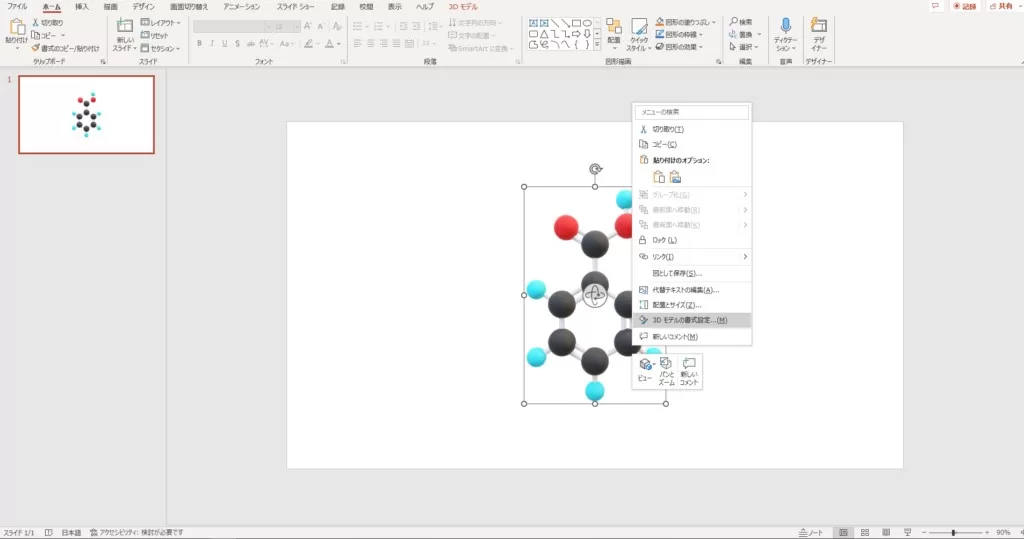
Tinker with “formatting 3D models”.
Once you have successfully inserted the 3D model, you can tweak its size, position, etc. as you wish: place the cursor over the 3D model, right-click, and select “Format 3D Model”.
Fill and Line
You can change the color of the selected object’s border and the inside of the border. The default is no fill and no line. *This does not directly affect the 3D model.

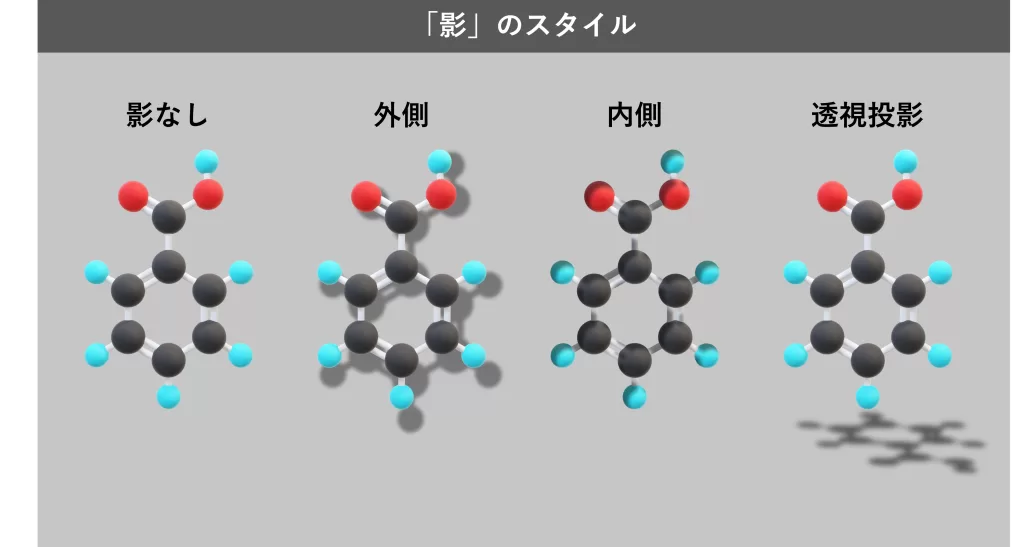
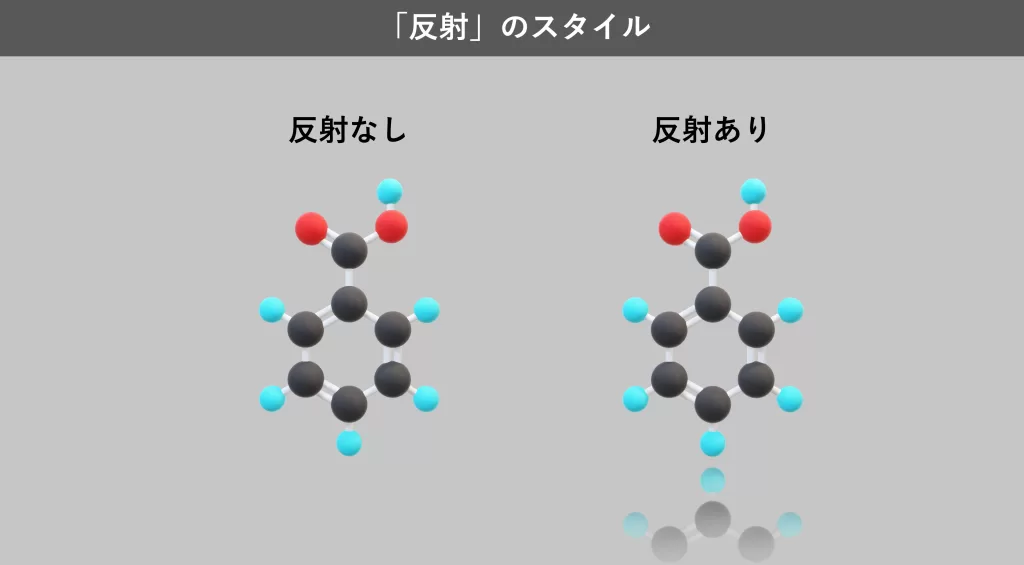
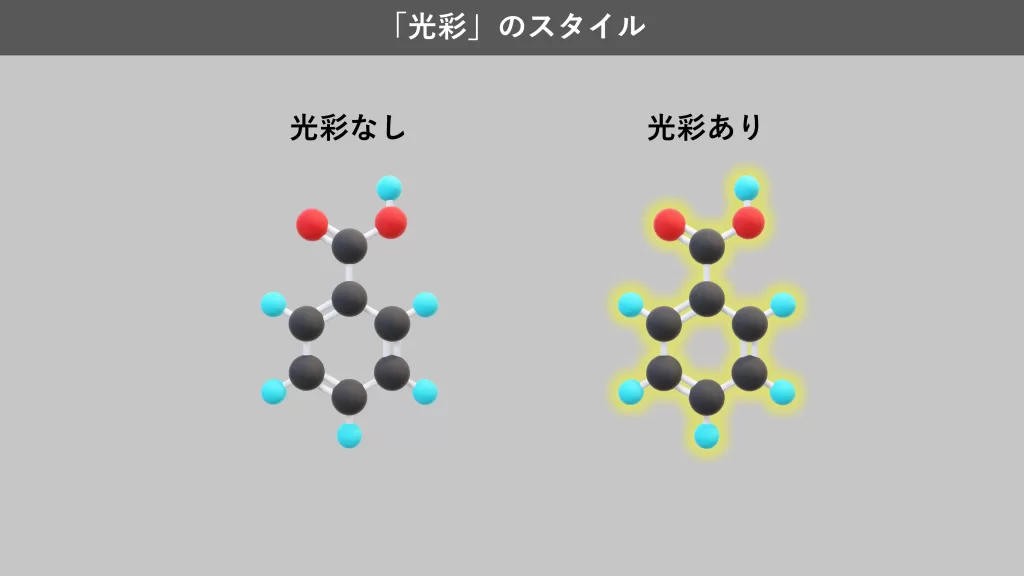
Effects such as shadows and reflections
Shadows can also be cast on the 3D model and it can be illuminated.
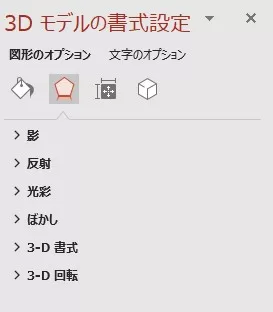
Adjustment of size and position
Size and position can be adjusted with the mouse, but can also be fine-tuned by entering specific numerical values.
What is a “Correction value for Powerpoint”?
The “Correction value for Powerpoint” is a value that we have set independently for the display size of the 3D model.
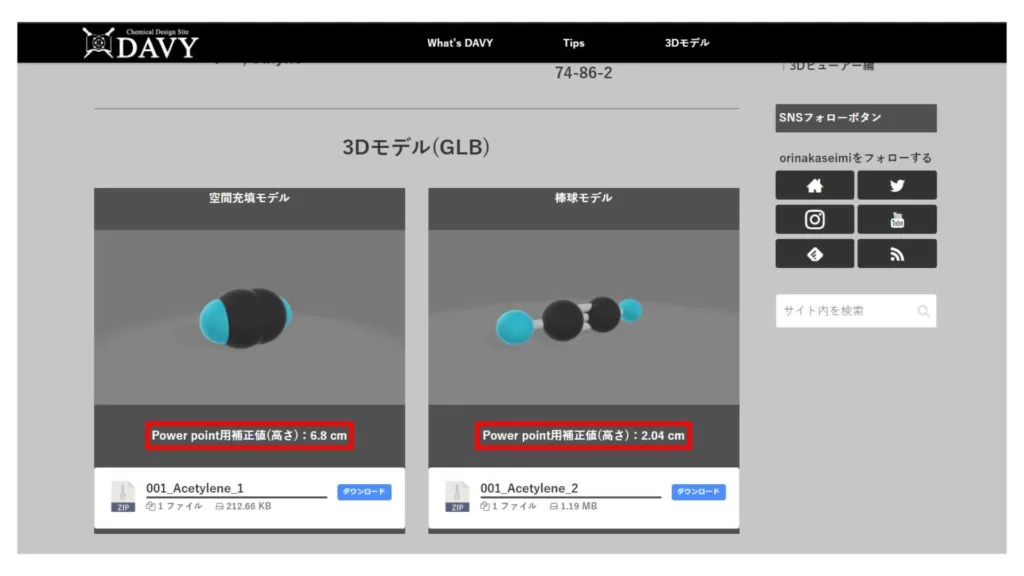
The individual 3D models provided by this site are sized appropriately, but when the 3D models are inserted into PowerPoint, they are resized in a troubling way.
To solve this problem, adjust the size in the “Format 3D Model” section. Set the height in the “Size” column to the same value as the “Correction value for PowerPoint” shown on the site. For images, set Oxygen to 1.82 cm and Hexane to 6.24 cm.
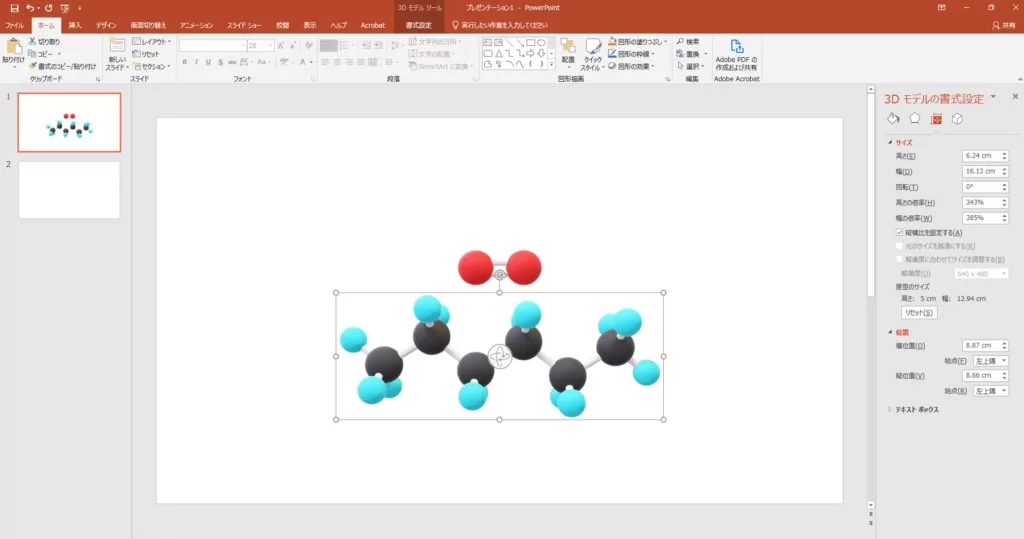
The adjustment was successful. However, you may want to make more detailed adjustments, such as scaling up or down, while keeping the same size ratio. In this case, click on the image while holding down the Shift key to make multiple selections, and then set each parameter in the “Size” column.
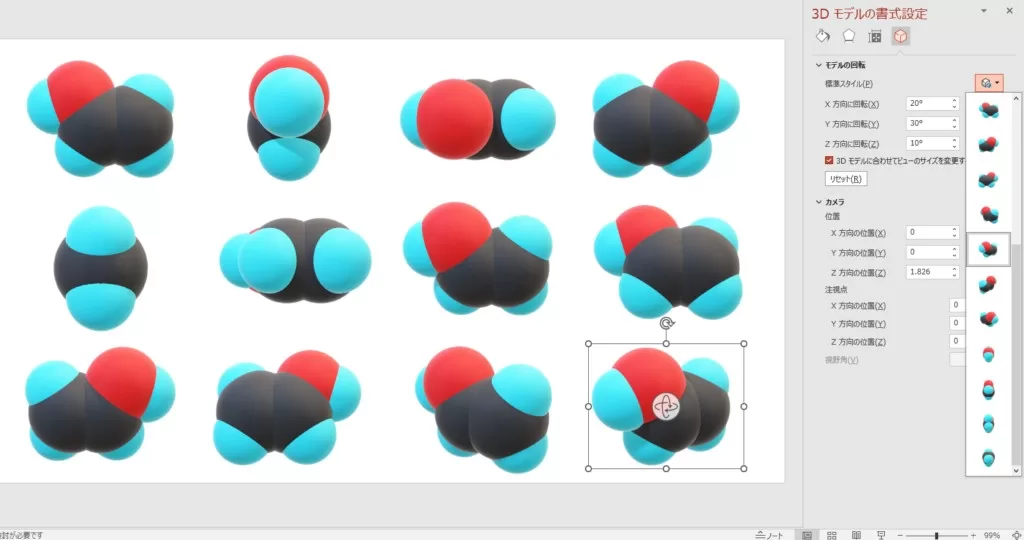
Model rotation and camera adjustment
You can rotate the 3D model to any angle you like. The camera can also be rotated around the object and the viewpoint can be moved, but there seems to be little opportunity to adjust this.
Animation for movement
As with 2D images, simple animations can be added. In addition to the commonly used fades and float-ins, there are other animations that can be set only on 3D models.
fade-in
It appears slowly as it rotates. By right-clicking on the animation and selecting the effect options, you can set the axis of rotation and the duration of the animation.
turntable
This is an animation of a single rotation. By right-clicking on the animation and selecting the effect options, you can set the speed of rotation, number of rotations, etc.
swing
The image oscillates around its center. By default, it swings left and right, but you can set the direction of the swing by right-clicking on the animation and selecting the effect option.
Jump and turn
This is a dynamic animation. By right-clicking on the animation and selecting the effect options, you can set the direction of the turn and the height of the jump.
fade-out
This is the reverse version of Fade-in. It can be set in the same detailed manner as fade-in.